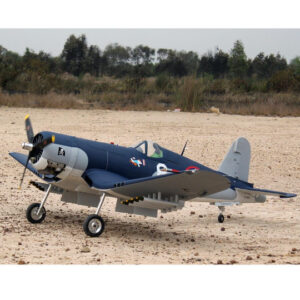
 Painting and detailing your F4U Corsair model can be a fulfilling yet challenging endeavor, requiring meticulous attention to detail and a thorough understanding of various techniques. To begin with, it is essential to prepare the model surface meticulously. This preparatory stage involves cleaning the plastic parts to remove any mold release agents that could hinder paint adhesion. A mild detergent and warm water, followed by thorough drying, should suffice. Sanding the surface with fine-grit sandpaper can further enhance paint adhesion by creating a slightly rough texture.
Priming the model is the next crucial step, serving as a foundation for subsequent layers of paint. Choosing the right primer is paramount; an acrylic or enamel primer specifically designed for plastic models will yield the best results. Applying the primer in thin, even coats is advisable, ensuring complete coverage without obscuring fine details. Allow sufficient drying time, as rushing this process can lead to imperfections in the final paint job.
Once the primer has fully cured, selecting the appropriate paint type is essential. Acrylics, enamels, and lacquers each have their unique properties and advantages. Acrylic paints are water-based, making them easy to clean and quick to dry, whereas enamels offer a more durable finish but require longer drying times. Lacquers provide a hard, glossy finish but necessitate proper ventilation due to their strong fumes. The choice of paint largely depends on personal preference and the desired finish.
When it comes to painting techniques, airbrushing is highly recommended for achieving a smooth, even coat. It allows for precise control over paint application, reducing the risk of brush strokes and ensuring a professional finish. However, if airbrushing is not an option, using high-quality brushes and applying multiple thin coats rather than a single thick one can still produce excellent results. Consistency in paint application is key, as uneven layers can detract from the model’s overall appearance.
Detailing the F4U Corsair model requires a steady hand and a keen eye for accuracy. Panel lines, rivets, and other intricate features can be highlighted using a technique called pin washing. This involves applying a thinned-down wash, typically a dark color, into the recessed areas to create depth and contrast. Capillary action will draw the wash into the crevices, enhancing the model’s realism. Excess wash can be carefully removed with a clean brush dampened with thinner.
Decals play a significant role in adding authenticity to the model. Proper decal application involves soaking the decal in water until it slides off the backing paper, then carefully positioning it on the model’s surface. Using a decal setting solution can help the decal conform to the model’s contours, ensuring a seamless appearance. Once the decals are in place and dry, sealing them with a clear coat will protect them from damage and blend them into the paintwork.
Weathering techniques can further enhance the realism of your F4U Corsair model. Chipping, streaking, and dry brushing can simulate wear and tear, adding character to the aircraft. Chipping can be achieved by using a fine brush or sponge to apply small amounts of silver or metallic paint to areas prone to wear. Streaking effects can be created by drawing thin lines of oil paint or weathering pigments and then blending them with a soft brush. Dry brushing involves lightly loading a brush with paint and gently sweeping it over raised details to highlight edges and create a worn effect.
In conclusion, painting and detailing an F4U Corsair model is a complex process that demands patience, precision, and practice. By following these tips and techniques, modelers can achieve a highly detailed and realistic representation of this iconic aircraft, ultimately enhancing their skills and enjoyment of the hobby.
